Tuesday, October 13, 2015

Access SQL Data through Custom Web Service for InfoPath

Access SQL Data through Custom Web Service
1.       First connect to your SQL Server and get the connection string according to the database.


2.       Create your InfoPath Form according to your requirement. In here we are retrieving data from SQL table using Item Number. Finally publish the form to the InfoPath Library.


3.       Write a custom Web Service to retrieve data from SQL table. Deploy it to the Local host
[WebMethod]
           public DataSet GetItems()
           {
               string constr = "Data Source=<Server Name>;Initial Catalog=<Database Name>;User ID=XX;Password=XXXXX";
              
               using (SqlConnection con = new SqlConnection(constr))
               {
                   using (SqlCommand cmd = new SqlCommand("SELECT * FROM [SamplesOrderWF].[Products]"))
                   {
                       using (SqlDataAdapter sda = new SqlDataAdapter())
                       {
                           cmd.Connection = con;
                           sda.SelectCommand = cmd;
                           using (DataSet dt = new DataSet())
                           {
                               sda.Fill(dt);
                               return dt;
                           }
                       }
                   }
               }


4.       Then Add data connection to the InfoPath Form to retrieve data from Custom Web Service
Manage Data Connection -> Add-> Create New Connection to: Receive Data -> Select SOAP Web Service -> Give the URL http://localhost:59651/Service1.asmx?WSDL-> Select the Web Service Method “GetItems” -> Finished


5.       Then Select the connection in Data Connection Window and click convert to connection file. Give path to data connection library.

6.       Then manage data connection -> add -> Search for connection on a MS SP Server -> Manage site -> Give site details.-> select .udcx file -> Finish


7.       Then select the Text box you are going to retrieve data and add rules for it.


8.       Finally publish the form to the library again.


Tuesday, June 16, 2015

Working with Linked Servers

By creating a linked server, you can work with data from multiple sources.
Capabilities in Linked Server
·        Distributed queries can be run against this server.
·         Queries can join tables from more than one data source.
·         If the linked server is defined as an instance of SQL Server, remote stored procedures can be executed.
Permission
When using Management Studio requires CONTROL SERVER permission or membership in the sysadmin fixed server role.

To create Linked Server use any of the following:
•         SQL Server Management Studio
•          Transact-SQL

Steps

 In SQL Server Management Studio, open Object Explorer, expand Server Objects, right-click Linked Servers, and then click New Linked Server.   


The “New Linked Server” Dialog appears. Type the name of the instance of SQL Server that you area linking to.
[Server type]: Select [SQL Server] Option


Go to [Security] page, select [be made using this security context] option and set parameters
          Remote Login: sa

          Password:**********


Test your connection finally


Testing example to get Nintex WF Instance Name

Nintex Test WF is in my local Server ‘WSS_Content_NintexKidde’. So I have update Instance Id and Instance        Name to the Local DB table ‘Customer’.

I have connect to lenel Server using Linked Servers access Nintex DB there.


Finally I retrieve WF Instance Name from the Local Server of specific Instance WorkflowID in Nintex Server DB.


Friday, April 24, 2015

Custom Report generation in Nintex Workflow

Step 1.  First create the sample InfoPath Form which you need to insert data to the SQL DB.


Step 2.  Then create a Nintex Workflow to insert data to the Table in the DB.


This is the Table to save data.


Step 3. Create the .xml for our report format.

<?xml version="1.0" encoding="utf-8"?>
  <ReportDefinition xmlns:xsi="http://www.w3.org/2001/XMLSchema-instance" 
  xmlns:xsd="http://www.w3.org/2001/XMLSchema">
     <AllowCaching>true</AllowCaching>
     <CacheTimeOut>60</CacheTimeOut>
     <SqlQuery>GetAllCustomerDetails</SqlQuery>
     <QueryType>StoredProcedure</QueryType>
     <PageSize>20</PageSize>
     <AllowSorting>true</AllowSorting>
     <JoinType>Group</JoinType>
     <PagingMode>Inbuilt</PagingMode>
     <Scope>Farm</Scope>
     <ReportColumns>
<ReportColumn>
               <GroupOperator>Key</GroupOperator>
               <SortExpression>CustomerName</SortExpression>
               <Sortable>true</Sortable>
               <Name>CustomerName</Name>
               <DisplayName>CustomerName</DisplayName>
               <DisplayType>Default</DisplayType>
               <IsTextColumn>true</IsTextColumn>
               <IsValueColumn>false</IsValueColumn>
          </ReportColumn>
          <ReportColumn>
               <GroupOperator>Key</GroupOperator>
               <SortExpression>Addrress</SortExpression>
               <Sortable>true</Sortable>
               <Name>Addrress</Name>
               <DisplayName>Addrress</DisplayName>
               <DisplayType>Default</DisplayType>
               <IsTextColumn>true</IsTextColumn>
               <IsValueColumn>false</IsValueColumn>
          </ReportColumn>
 <ReportColumn>
               <GroupOperator>Key</GroupOperator>
               <SortExpression>Amount</SortExpression>
               <Sortable>true</Sortable>
               <Name>Amount</Name>
               <DisplayName>Amount</DisplayName>
               <DisplayType>Defult</DisplayType>
               <IsTextColumn>false</IsTextColumn>
               <IsValueColumn>true</IsValueColumn>
          </ReportColumn>
          <ReportColumn>
               <GroupOperator>Key</GroupOperator>
               <SortExpression>Date</SortExpression>
               <Sortable>true</Sortable>
               <Name>Date</Name>
               <DisplayName>Date</DisplayName>
               <DisplayType>DateTime</DisplayType>
               <IsTextColumn>false</IsTextColumn>
               <IsValueColumn>true</IsValueColumn>
          </ReportColumn>
     </ReportColumns>
     </ReportDefinition>

·        Step 4. StoredProcedure created in the Nintex DB in SQL Server.

ALTER PROCEDURE GetAllCustomerDetails
      AS
BEGIN
      SET NOCOUNT ON;
      SELECT [CustomerName],
      [Addrress]
      ,[Amount]
      ,[Date]
  FROM [WSS_Content_NintexKidde].[dbo].[Customer]
  END
GO

Step 5. Add Custom report through Central Admin

Step 6.   After adding the report we can access it through the Workflow Reporting 


Wednesday, December 24, 2014

Inline Approval Function

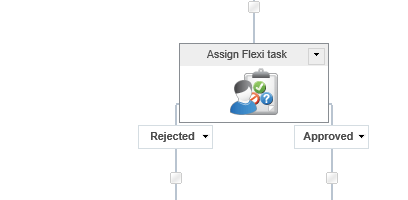
This is helpful you to work with InfoPath form approval for Approval task using Flexi task or request task actions.

1.       Create Web Service to get “SharePointTaskId”

·         Manage data connection à Addà Create a new connection à Receive data àSoap Web service à enter following link


·         Select “GetRunningWorkflowTasksForCurrentUser” à Next à Finish

2.       Create a web service to get Task ID and Outcome
·         Manage data connection à Addà Create a new connection à Receive data àSoap Web service à enter following link
·         Select “ProcessTaskResponse3” à Next


With Flexi Task Action :
·         Select “ProcessFlexiTaskResponse2” 


·         Put Task list name : eg -->“Personnel Requisition Workflow Tasks”

You have to configure Task Outcome values in InfoPath Form as “Approved” or “Rejected”

3.       Sumbit button function

·         Add rule for Disable Submit button


·         Add Sumbit rule  à
·         Set field value for outcome : Set outcome form ProcessTaskResponse3/ProcessFlexiTaskResponse2 Web service.


·         Set Task ID : Set spTaskId form ProcessTaskResponse3/ProcessFlexiTaskResponse2 Web service.


·         Set SharePointTaskId form “GetRunningWorkflowTasksForCurrentUser” Web service.


·         Set Query Data


·         Set HasTask false :


·         Send Update


·         Finally Close the form action .

4.       Set Form Load function
·         Query by task  -Set fileUrl à to form variable


·         Set Query connection :


5.       Set Set hask task = true
·         Check condition FileUrl is not blank and  TaskType = "Approval"(for ProcessTaskResponse3) or TaskType = "MultiOutcome" (for ProcessFlexiTaskResponse2)

·         Set variables for task type


·         Set Has task variable = true()


6.       Error
·         If you are getting this kind of error check the web service links and verify


Workflow end configuration for Flexi Task.

<ProcessFlexiTaskResponse2 xmlns="http://nintex.com">
      <comments>string</comments>
      <outcome>string</outcome>
      <spTaskId>int</spTaskId>
      <taskListName>string</taskListName>
    </ProcessFlexiTaskResponse2>


Workflow end configuration for Request Approval Task. Please notify that you have to put below outcomes only.

<ProcessTaskResponse2 xmlns="http://nintex.com">
      <comments>string</comments>
      <outcome>None or Approved or Rejected or Pending or Cancelled or NotRequired or Continue or Delegated or Custom or OverrideApproved or OverrideRejected or OverrideContinue</outcome>
      <spTaskId>int</spTaskId>
      <taskListName>string</taskListName>
    </ProcessTaskResponse2>